Translations: "Spanish" |
Home Lab Part 3: Building the first version of my home lab
Now its time to share the experiences I had while building my home lab. Keep in mind that I began this project back in March 2016. First, I set a group of criteria during the planing of the build of the equipment I wanted to use in the first iteration of my server.
The main ones was:
- RAM Capacity: Because the primary use case is to run virtual machines, the number of virtual machines depends directly on the amount of RAM, the 16 GB of RAM I had on my laptop back then wasn't enough. The maximum amount of RAM of desktop computers at the time of the first iteration (2016) was 32 GB of RAM. Later in 2017, Intel launched the X299 chipset series along with the X-series Processors that can support 128 GB of RAM, depending on the motherboard. And as I could imagine, it was not the cheapest motherboard in the market.
- VMWare compatibility: Most of the integrated network interfaces of desktop computers are not in the HCL of VMware and require extra steps to create a custom media installation, and even with that, I found stability issues when I used a laptop as an ESXi server (hello purple screen of death).
- Power Efficiency: Because of the first two options, the obvious answer will be to go with server-class hardware. I have seen a lot of people taking good deals for used servers; however, most of them drain a pretty serious amount of Watts, so whatever amount you save with the cost of acquisition, you may end paying extra in the electricity bill.
- Space: Living in an apartment where there is not much space, a full-size enterprise server was not an option. During my research, I came along some blogs related to virtualization and found that it was common to use an Intel NUC to run virtualization labs. However, it conflicts with points 1 and 2 from my first list and also had some other constraints, especially related to expansion. Along with other factors that I found later.
Then I found this blog post of the TinkerTry Blog by Paul Braren, and he tested a very viable solution using hardware from Supermicro that can accommodate:
- Xeon-D processors with 8 Cores
- Up to 128 GB of RAM
- VMware compatible Intel i350 1GbE network ports
- Eventually, were included in the VMware HCL list.
The first time I heard about the Xeon-D processor, I was amazed, this processor line is the Intel proposal for the microserver market. Based on the same architecture as server-grade CPUs but with the SOC concept embedded into a motherboard, with support for lots of RAM, and with low power consumption in mind.
All this helped me to decide to go with Supermicro, and later I found a blog post that managed to put together a very nice comparison and explained how the Supermicro microservers are way better than Intel NUCs, at least for home lab purposes. I just checked that the link to the blog post from my bookmarks and found that is not active anymore, however, thanks to the Internet Archive "Way Back Machine" here is the post
From the TinkerTry Blog, the build was focused on the mid-tower form factor, and at that time, I was more inclined to a rack compatible form factor as I was also planning to add a stack of switches for testing.
The first option was to get the barebone SuperServer 5018D-FN4T, but I wasn’t convinced about the passive cooling of the CPU, as this was going to be on my apartment, where there is no AC for example, or any other conditions to ensure proper working of a passive cooling solution. So, I decided to get the chassis and the motherboard apart and assemble it my self, and after a look around for other components this was the bill of materials of the parts I got:
| Amount | Title / SKU | Description | URL |
|---|---|---|---|
| 1 | Supermicro Chassis SC505-203B | 1U chassis | https://bit.ly/2Lgery1 |
| 1 | Motherboard X10SDV-TLN4F | Variant of the X10SDV-8C-TLN4F, but with active-cooling | https://bit.ly/3fCqHXD |
| 4 | HYNIX 32 GB RAM MEM-DR432L-HL01-ER2 | RAM included on the compatibility list of the Supermicro site. | https://bit.ly/2AhMEuT |
| 2 | Samsung 950 PRO m.2. 512 GB | NVMe Storage | http://amzn.com/B01639694M |
| 1 | Supermicro RSC-RR1U-E8 | Riser to accomodate a PCIe card in the 1U format/space | http://amzn.com/B005EV1464 |
| 1 | Angelbird PX1 | M.2 SSDs PCIe x4 adapter | https://bit.ly/3fyb6s2 |
| 1 | Supermicro MCP-260-00085-0B | 1U I/O Shield for the chassis SC505-203B | http://amzn.com/B00SH0F0VY |
Some notes from this first BOM:
- NVMe SSD : OK, I admit it, that was a little bit overkill, but after enjoying the speed benefits of use NVMe storage, it worth every extra dollar.
- The PCIe adapter not only covers the function to provide an extra M.2 interface, it also provides enugh heat disipation for the M.2 sticks
- The IO shield included in the Motherboard didn't match with the chassis, so an extra USD 10 was not much compared with the rest of the BOM.
How much compute power provided this?:
- CPU: 2.10 GHz with 8 Cores and 16 Threads
- RAM: 128 GB
- Storage: 1 TB SSD NVMe
Back then I didn't had how to measure the energy usage, and as a reference from the TinkerTry Blog, I quote:
"Idles under 40 watts, but even with heavy loads, and all 4 3.5" hot-swap
drive bays full, it only gets that up to 85 watts or so."
source: https://tinkertry.com/superserverworkstation
I tried to do my best looking into my files to find some pictures of the build, and these are the ones I found:
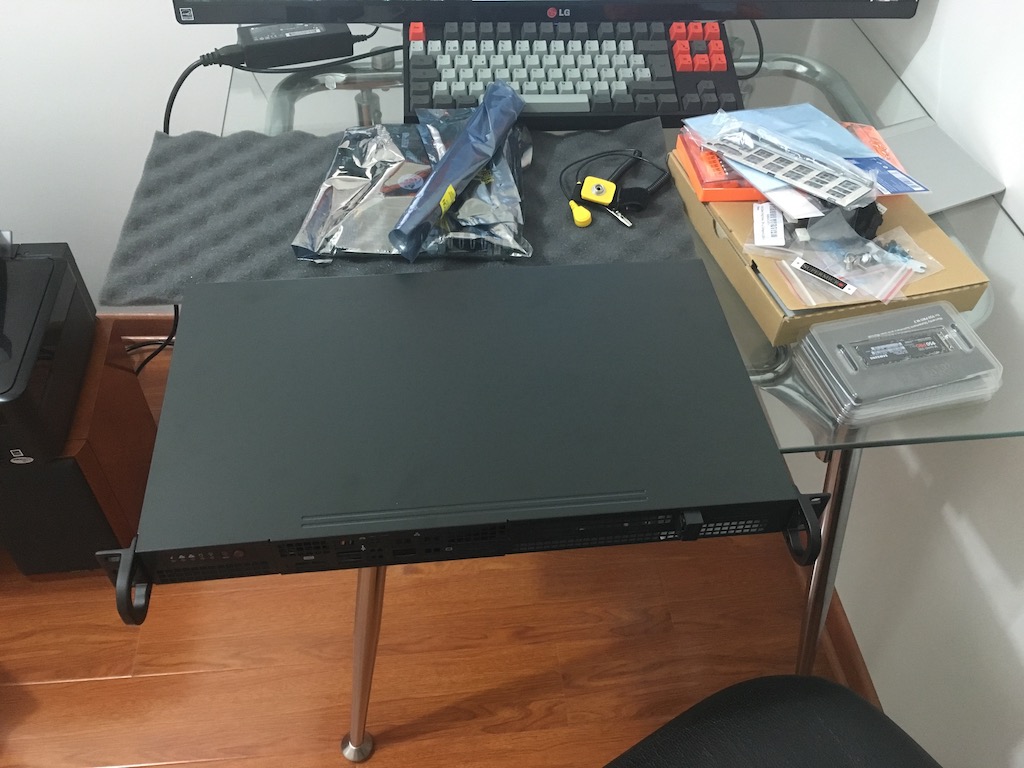
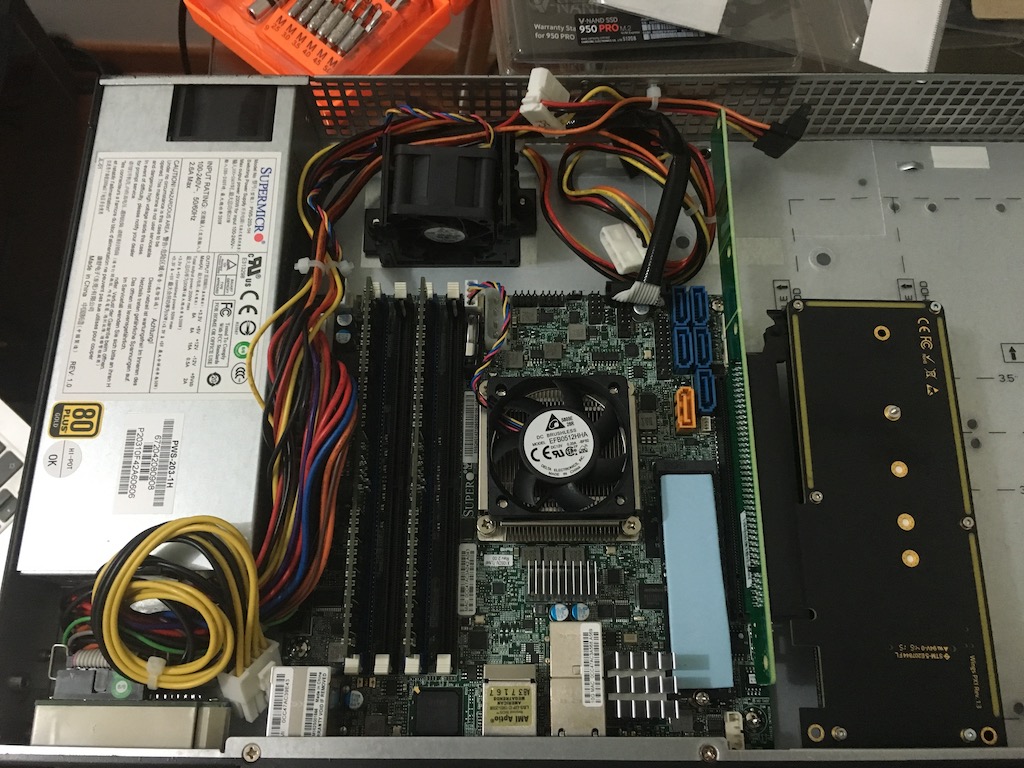
From that picture, you can see that the chassis only came with one fan, and the system was warming up more quickly than I expected. The first mistake I made was to add two more fans, and the error was to get the parts from Supermicro, thinking that it should be better stick to the optional components from the manufacturer catalog. And no matter if you use the PWM (Pulse With Modulation) to control the fan speeds, those little devils are loud!.
As a reference, this are the extra parts I got:
| Amount | SKU | Description | URL |
|---|---|---|---|
| 1 | MCP-320-11101-0N | Fan holder 4-pin for 2x 4028 fans | http://amzn.com/B0021YAGCU |
| 2 | Supermicro FAN-0100L4 | 1U-4-Pin PWM Fan for SC510 SC511 | http://amzn.com/B001A25AXY |
Later I made a double mistake when added another server with the same set of fans.
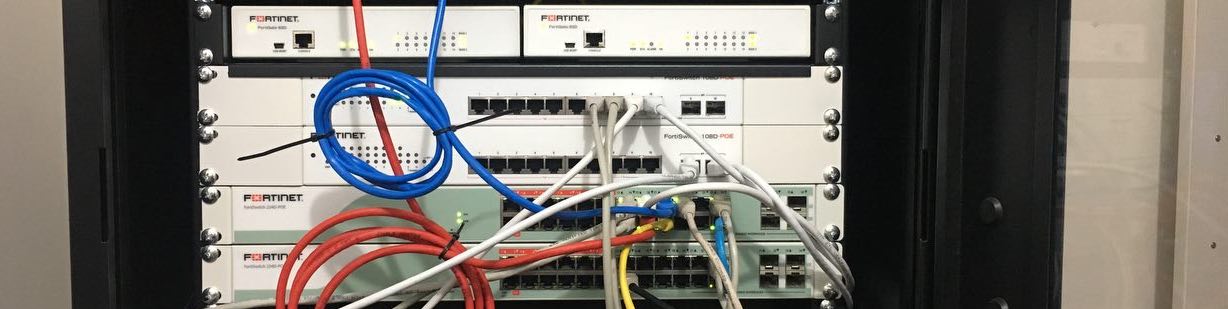
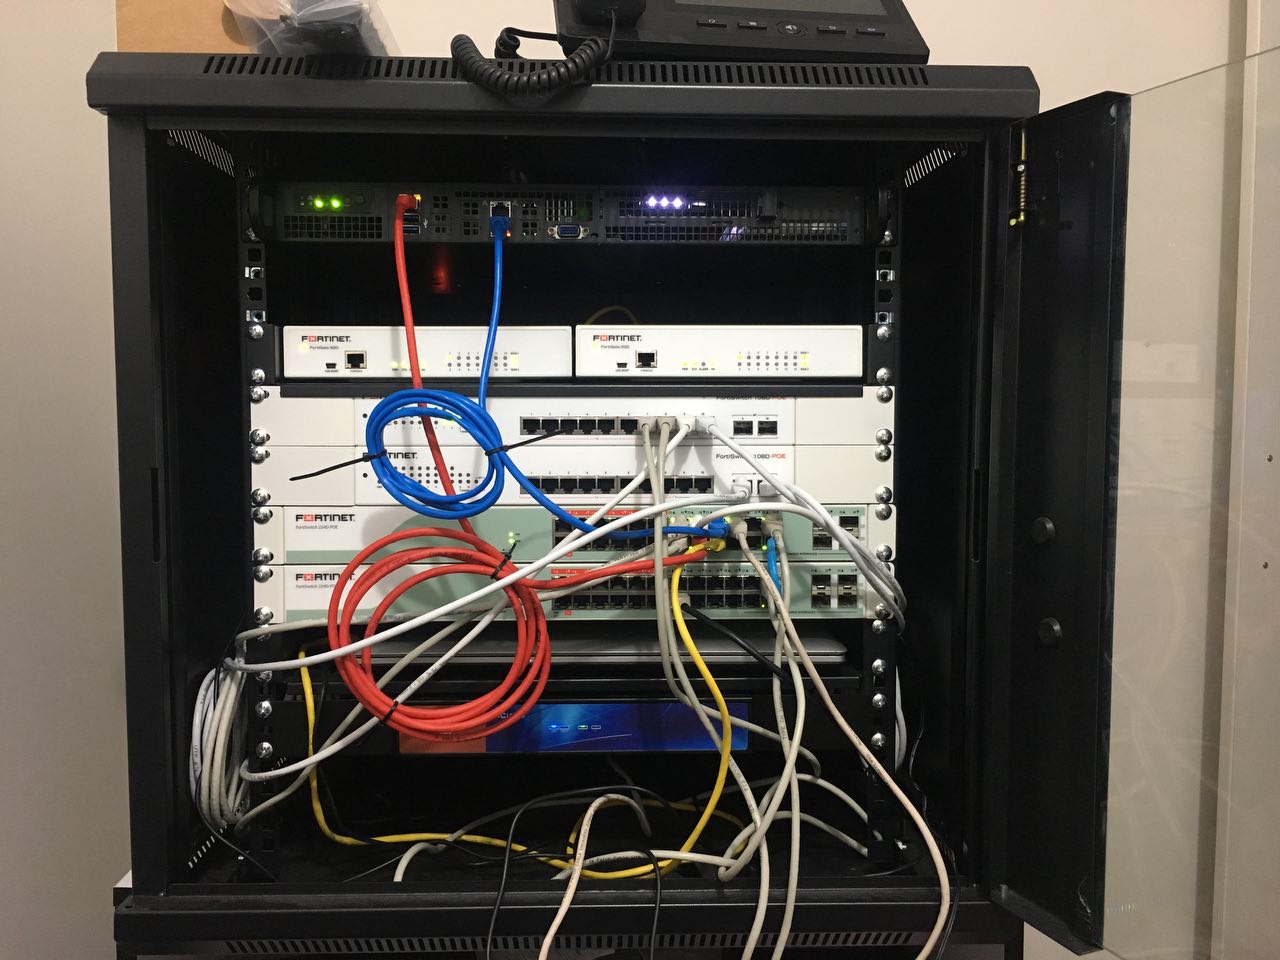
And this is the small 12U wall mount rack I had back then, along with the server there is a cluster of FortiGate 90D and two FortiSwitchs 108D-POE:
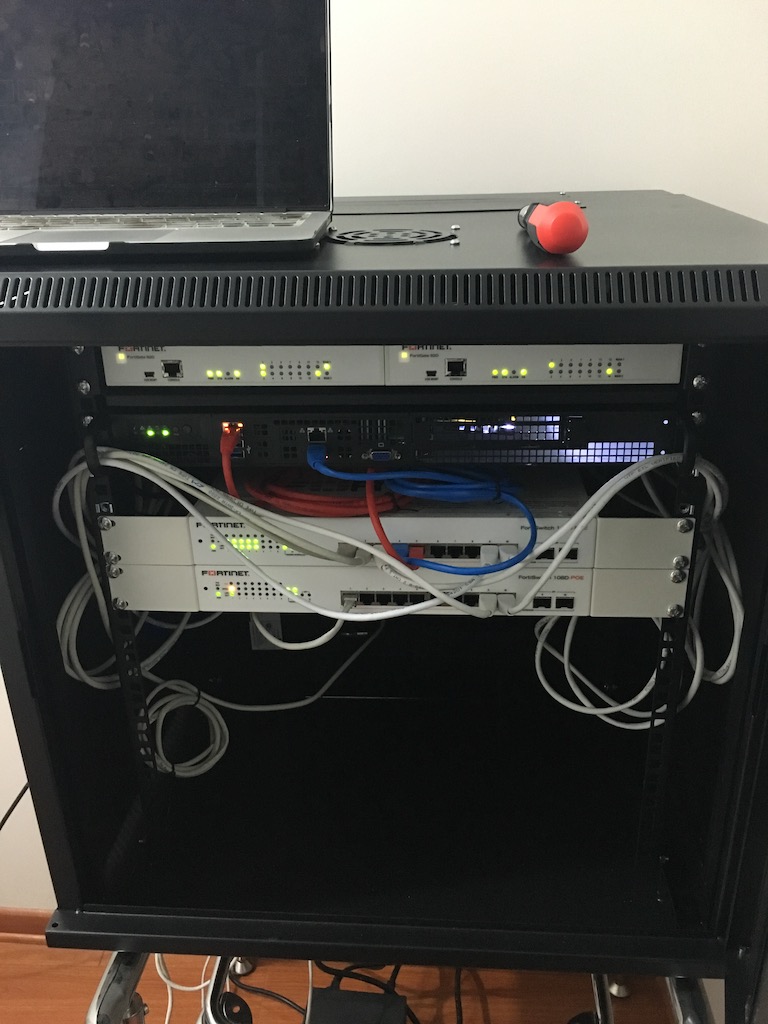
And it eventually become more complete (sorry for the cable management)
I have good learning memories from that time, but a year later the server resources were not enough for my exercises, especially related to ATP with sandboxing technologies, along with SIEM investigation and a complete environment for simulate enterprise environments mixing Windows, Linux VMs and different technologies from NGFW, Sandboxing, ADC, Mail Security and a long, etc.
So in 2017, I made the first upgrade, and I added a second server with the same specs plus a boot disk for the ESXi installation and an extra disk as storage for ISO files and backups as the NVMe storage was mainly used for the active VMs.
For this upgrade, I got these parts to use one of each per server:
| Amount | SKU | Description | URL |
|---|---|---|---|
| 2 | SSD-DM016-SMCMVN1 | Supermicro 16GB SATA DOM | http://amzn.com/B01MXWJHG0 |
| 2 | HGST 8TB Ultrastar He8 HUH728080ALE604 | 8TB 7,2K RPM SATA 6Gb/s 128MB 3.5" HDD 512E | http://amzn.com/B00OHUNXKI |
Just after finish the upgrade and power-on the entire lab, if with one server, the noise were noticeable even with the closed door, which I avoid doing as is not a good idea as it affects proper airflow in the room.
As I mentioned before, I made a mistake by using the fans from the Supermicro catalog. The result, an unbearable noise in the entire apartment. My wife has always been very supportive of all this, and she didn't need to tell me anything to me to notice that I had to do something about it.
Again after research a little bit, I found Noctua a CPU cooler and fan manufacturer. And one of the main characteristics of their products is that they have the technology to provide low noise and highly efficient cooling solutions.
I ended ordering 6 x Noctua NF-A4x20 PWM, for about USD 15 each, a bit expensive for a fan, but worth it, even the package is very high quality and the set of accesories provided to fulfil any need related to the usage of those fans, premium fans is a more accurate way to refer to them, again tey worth it!
After replace those loud fans from supermicro, the difference was huge, the airflow was good enough to keep the systems cool, and the noise level was just fine.
This is a comparation between the fans I got from Supermicro VS the fans I got from Noctua:
| Fan | Size | Full Speed | Max Noise Level | Max Airflow Rate |
|---|---|---|---|---|
| FAN-0100L4 | 40mm | 8500 RPM | 34 dBA | 12 CFM |
| NF-A4x20 | 40mm | 5000 RPM | 14,9 dBA | 5.5 CFM |
Only as an exercise if we use the maximum values, and if we multiply the noise level of each fan from Supermicro, we are talking about 102 dBa per each server.
Based on the following chart of comparation, if the fans would be running at full speed would not be a good idea:

Graph credits: https://www.osha.gov/SLTC/noisehearingconservation/loud.html
After solve the noise issue and learned the lesson, I not only manage to improve knowledge about Fortinet products, but also wih VMWare, I even added a laptop running KVM with a nested ESXi as a VSAN Wwitnees to play wth the technology.
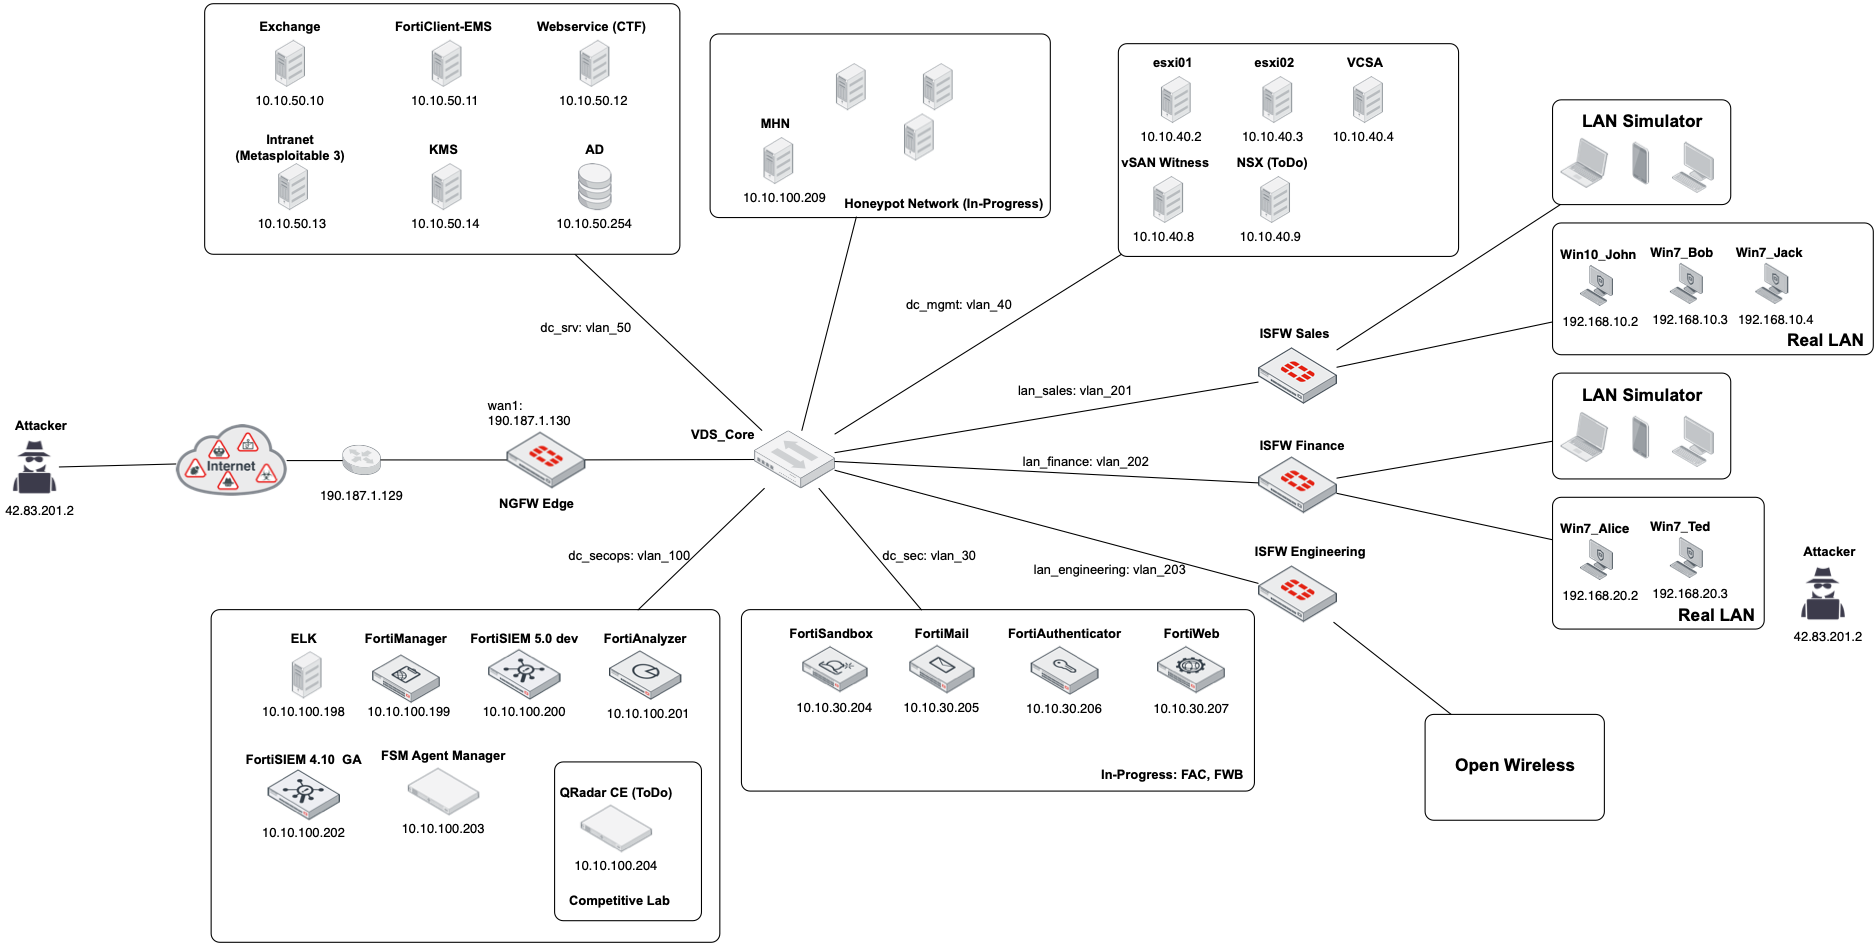
I found in my files a topology drawing I made at that time:
And before I forget, I can't recommend enough if you are planning to use VMware vSphere to run a home lab, to subscribe to the VMUG Advantage. For USD 200.00 per year, it gives you access to a broad catalog of VMware products with a proper license with the condition that can only be used in non-production environments. Most of the time, you can find a 10% discount coupon code on their site.
And all this setup served me well until early 2019, where I decided to apply some improvements more related to upgrade the platform from the Xeon-D 1500 series to the new Xeon-D 2100. The main reason to move was the support to up to 256 GB of RAM into a single system, that will allow me to shrink the lab and have several optimizations. I will detail this in the next post.
I hope these experiences help to anyone looking to build a home lab.
You can find my previous posts with this links:
And the next post of this series has been published here:
comments powered by Disqus